As part of the first ever M1Con, Digital Interruption’s @jayHarris_Sec gave a talk about mobile security and to fit the Mobile Security theme, we decided to put together an Android based CTF. To encourage everyone to participate, it was created with some technical and non technical elements. Shout out to @iamrastating for writing the code and @phyushin for being the first to complete it.
The application can be found on our Github.
Setting Up / Prerequisites
After installing the APK, a new application named “Safe Pass” will be installed. Launching this app will firstly prompt the user to allow access to the external storage. The reason for this, is so that it can write to a globally available database; to demonstrate the purposes of working outside the application’s sandbox.
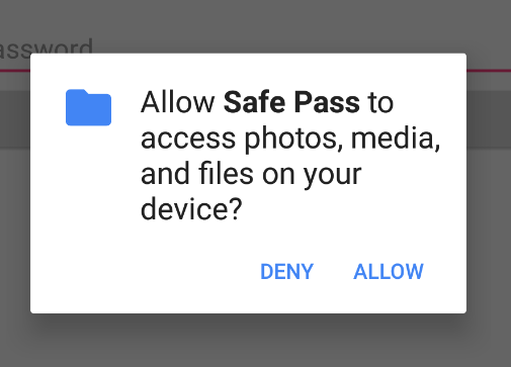
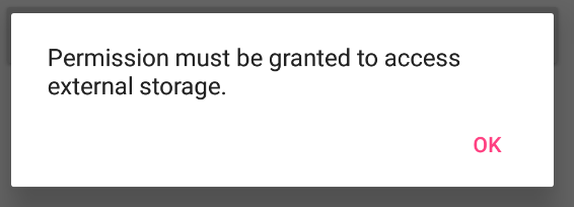
Should a user deny the request, the application will exit, indicating that it needs the permission to run:
The entire challenge can be finished using:
- An Android device / emulator
- A decompiler, such as jadx
- The SQLite CLI tool or a GUI, such as DB Browser for SQLite
- A tool for performing encryption and encoding operations, such as CyberChef
Step 1 - Initial Analysis
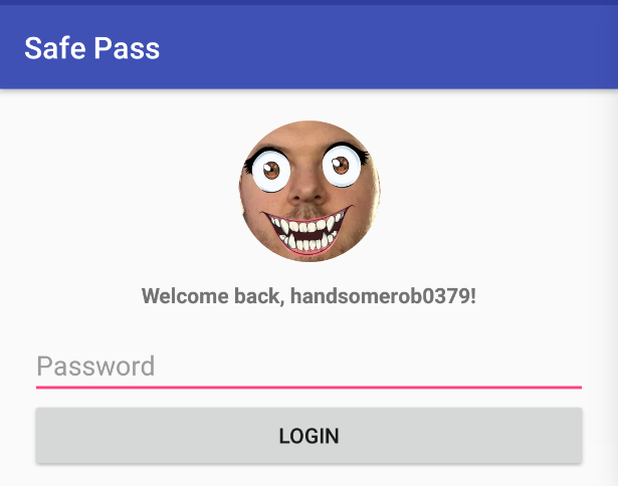
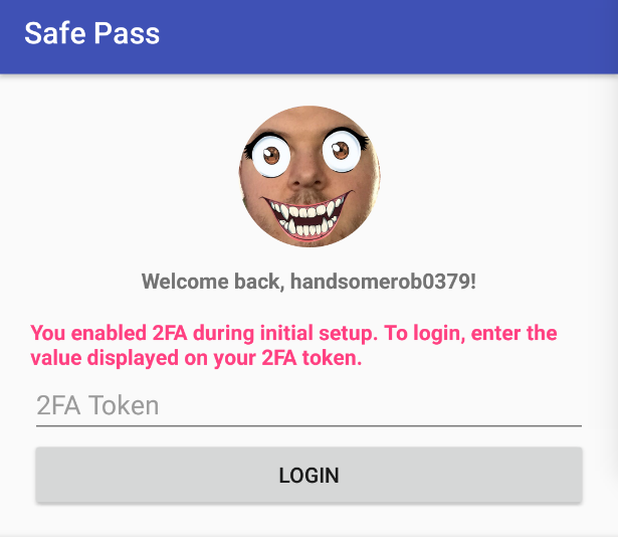
After getting the application set up, the first challenge that is presented is the login screen. A message is displayed welcoming back the user, and prompts solely for a password. At this point, one can either attempt to brute force the password (and have a small success rate), or start to delve into some OSINT, to see what can be gathered on the username handsomerob0379.
OSINT Framework will provide a significant amount of tools for carrying out reconnaissance on usernames. Running the username through one of these tools, namechk, will show that the username has been reused, with a few false-positives, and provide links to the profiles it finds. One of the profiles found, will be a Twitter account (https://twitter.com/handsomerob0379), which seems to be owned by the same user, due to the same / scary profile picture.
Step 2 - OSINT & Password Building
With the user’s Twitter profile now identified, some educated guesses can start to be made based on the posting habits of the user. Although users are forced by a lot of systems to make their passwords more complex by adding a mix of numbers, symbols etc. a common practise is for users to just stick with memorable patterns; which whilst mathematically strong, will significantly reduce the strength of the password against a targetted attack.
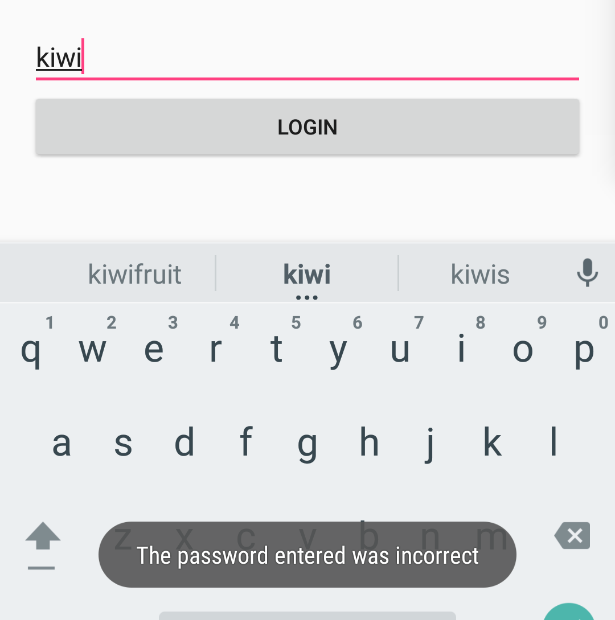
An initial look at the user’s Twitter profile reveals a [slightly strange] passion for kiwi fruit; which means it’s viable that the password will contain some kind of reference to it. Attempting to login with just the words “kiwi” or “kiwifruit” will not yield anything:
Most likely, a password will need to meet a minimum strength; this is usually done by forcing numbers or symbols to be present in the password. As most people have a numeric sequence that will be memorable to them (birth date, a pin code for building entry, phone number etc.), they tend to lean towards reusing these sequences in passwords. Circling back to the user’s username, presents a number that may be usable.
Trying to login with the password kiwi0379 will work and then present the 2FA screen:
Step 3 - Source Code Analysis of Login Procedure
Upon arriving at the 2FA screen, it will become evident that logging in to the application is not going to be possible. The next step is to start looking into the source code that the application is built upon.
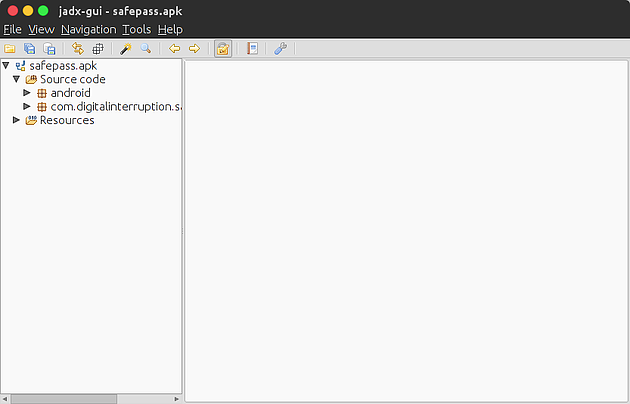
A number of tools exist to aid in this, but for the purpose of this document, jadx will be used. When launching jadx, it will instantly display a prompt to open a file, whilst here, choose the Safe Pass APK file. Shortly after opening the file, the program will load with the source code tree visible:
Expanding the com.digitalinterruption.* tree will reveal a number of classes; including a LoginActivity class. Inspecting this will reveal the code that is executed upon clicking the login button:
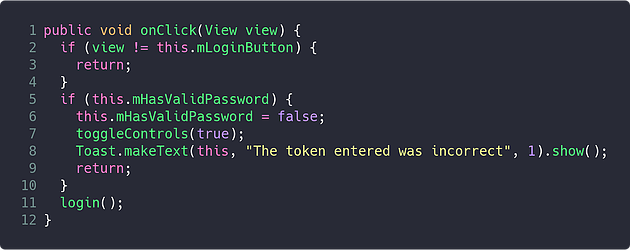
On line 5, it checks if the mHasValidPassword variable is set to true, if it is, it hits the 2FA blockade; otherwise, it will run the login method:
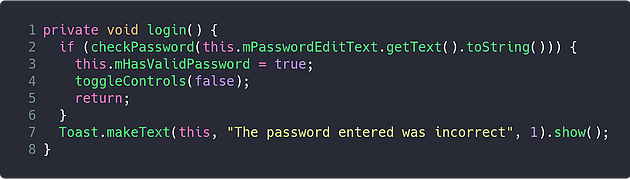
This method passes the contents of the password input to the checkPassword method, and if the return value is true, sets the mHasValidPassword variable that was previously seen in the click handler.
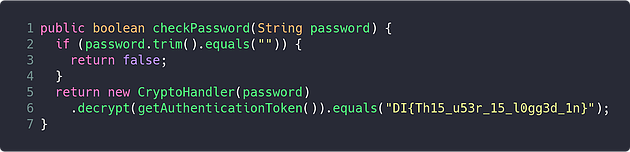
The checkPassword method now begins to reveal a bit more about the inner workings of the application. Assuming the user does not enter a blank password, it will use the password to construct a “CryptoHandler” object, which then decrypts the value returned by a method named getAuthenticationToken, and checks the result against a hard coded string; if the value is the same, the user is now considered logged in.
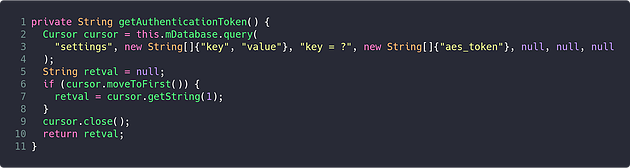
The getAuthenticationToken method reveals two important pieces of information required to further reverse the application:
- The application is using an SQLite database (identified by checking the declaration of
mDatabase) - The encryption in use appears to be AES, based on it trying to retrieve a value from the database with the key “aes_token”
Step 4 - Finding The Database
As an SQLite database is in use, and the application previously prompted to utilise the external storage, it would be reasonable to assume there’s a chance the database may be being stored in the external storage.
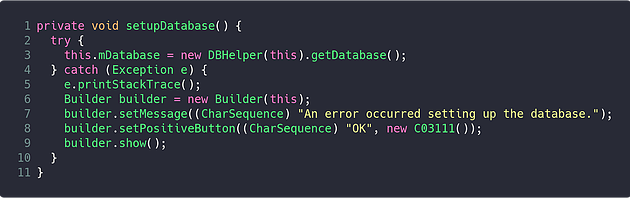
Examining the setupDatabase method of LoginActivity shows that the mDatabase variable is initialised using an instance of the DBHelper class:
Returning back to the source code tree, and expanding the data package will reveal the DBHelper class and allow for further analysis:

The method of the DBHelper class that was being used to acquire a connection was the getDatabase method; this method consists of only a single line, which opens the database from the path stored in the mDatabasePath variable:

Continuing to analyse the DBHelper class will show that there is only a single point of initialisation for the mDatabasePath variable; which is found within the ensureDatabaseIsCopied method.
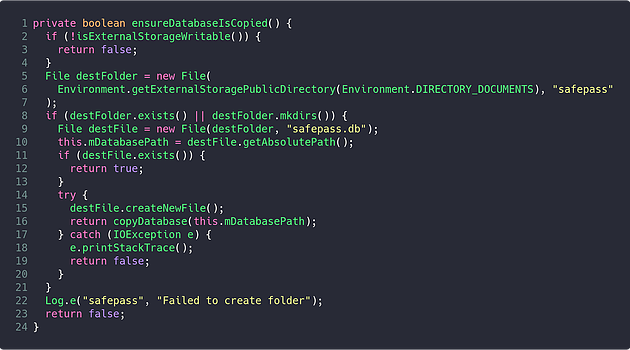
By taking a look at the implementation of this method, it is possible to determine where the database is stored. On line 5, the Environment.getExternalStoragePublicDirectory method is called with the DIRECTORY_DOCUMENTS enum. This method will return the “Documents” directory within the path to the storage area that is world writeable on the device; typically found at /mnt/sdcard.
Verification of this discovery can be executed by getting a shell on to the device, using adb, and then listing the contents of the /mnt/sdcard/ directory. Alternatively, if using a physical device - connecting it via USB and browsing the storage should reveal the same information.
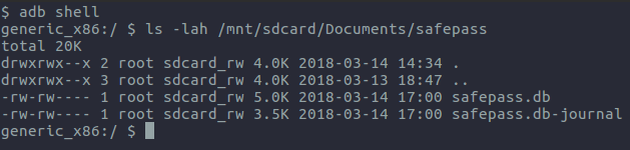
If mounting the device’s storage is not possible, but adb is usable (for example, if using an emulator), the database can be pulled back using the adb pull command as can be seen below:

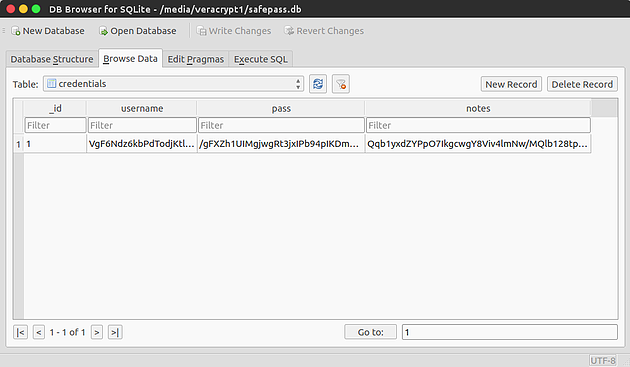
Once the database has been acquired, the [encrypted] data stored within it can be openly viewed using any application capable of opening SQLite databases:
Step 5 - Decrypting The Data
The final step of the challenge is to decrypt the data found within the recovered SQLite database. The information gathered throughout the challenge up to this point has led to the knowledge that the data seems to be being encrypted using the AES algorithm.
There are a number of ways that AES data can be encrypted / decrypted, a particularly simple method of doing this, is using CyberChef. However, as one will notice, to use the AES Decrypt recipe, both a “key” and “iv” must be specified; so further analysis of the source code will be required to see how these values are generated.
Previously, the CryptoHandler class could be found being instantiated using the password that the user supplied when they logged in, which is passed to the secretKey variable of the constructor method found below:

Within this method, the mKey variable is set on line 3, and the mIV variable is set on line 4 - both of which seem to be the key and IV that are used during the AES operations.
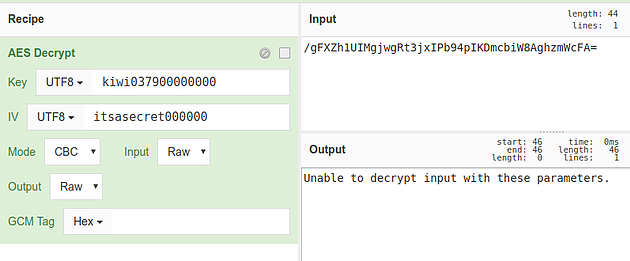
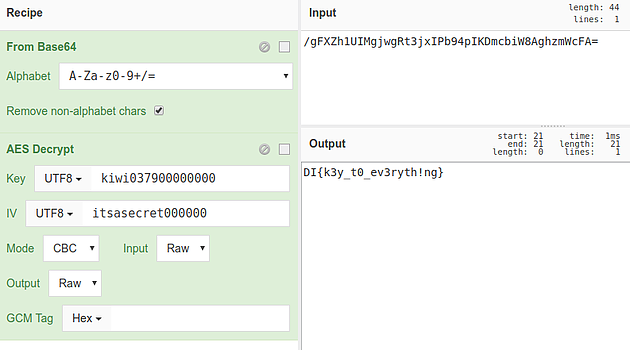
On line 3, the user’s password is padded with 16 zeros, and then the value is cut down to the first 16 characters; meaning that the AES key would be kiwi037900000000.
On line 4, the IV is simply hard coded as itsasecret000000. Using this information, a recipe can be put together on CyberChef to decrypt the data:
In this recipe, the key and IV values of the AES Decrypt operation are set to the values determined above, and their type set to UTF8, and the input is set to the value found in the pass column of the credentials table in the database.
Unfortunately, this will yield an error, indicating the data still cannot be decrypted:
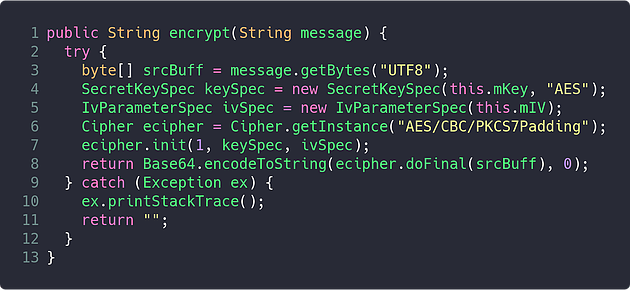
One final look at the CryptoHandler class, in particular the encrypt method, will reveal that after the data is being encrypted, it is being Base64 encoded:
In order to deal with this, the Base64 Decode operation can be added prior to the AES Decrypt operation, which will chain the result of the first operation to the second as its input:
Now, when running the recipe on CyberChef, the decrypted password can be seen in the output pane:
This CyberChef recipe can then be used to decrypt all remaining data found within the application’s database.